·
5 minute read
·
5 minute read
A step-by-step guide detailing our process for building HubSpot CMS websites from start to finish.
1. Connect domain to HubSpot
Connect your domain to HubSpot so that your HubSpot content can be accessed on the web. After connecting a domain, you can publish HubSpot pages, blog posts, knowledge base articles, and web versions of emails to it.

Visit HubSpot's knowledge base to learn more:
https://knowledge.hubspot.com/cos-general/connect-a-domain-to-hubspot
2. General settings
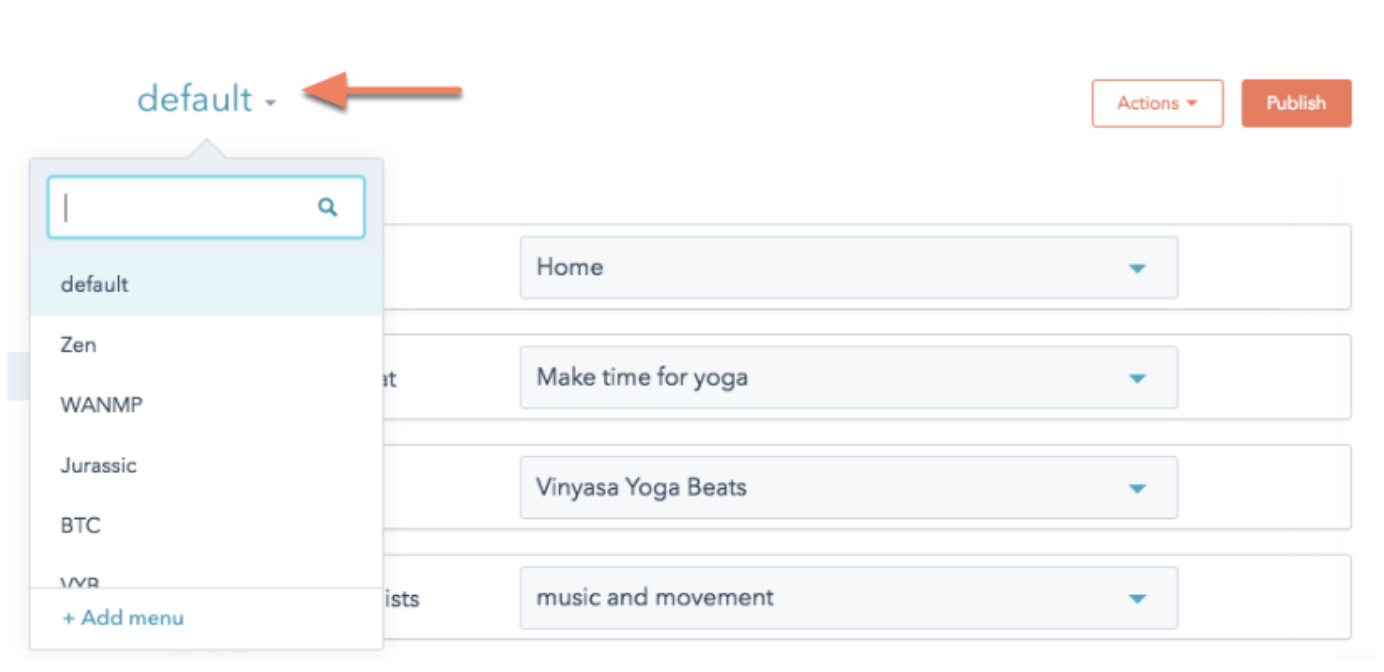
2.1 - Set up navigation menus
When building your website, you'll spend time organizing the information architecture of your content. Your navigation menus will include the most important pages that your website visitors will want to access quickly or frequently while browsing your site.
Visit HubSpot's knowledge base to learn more:
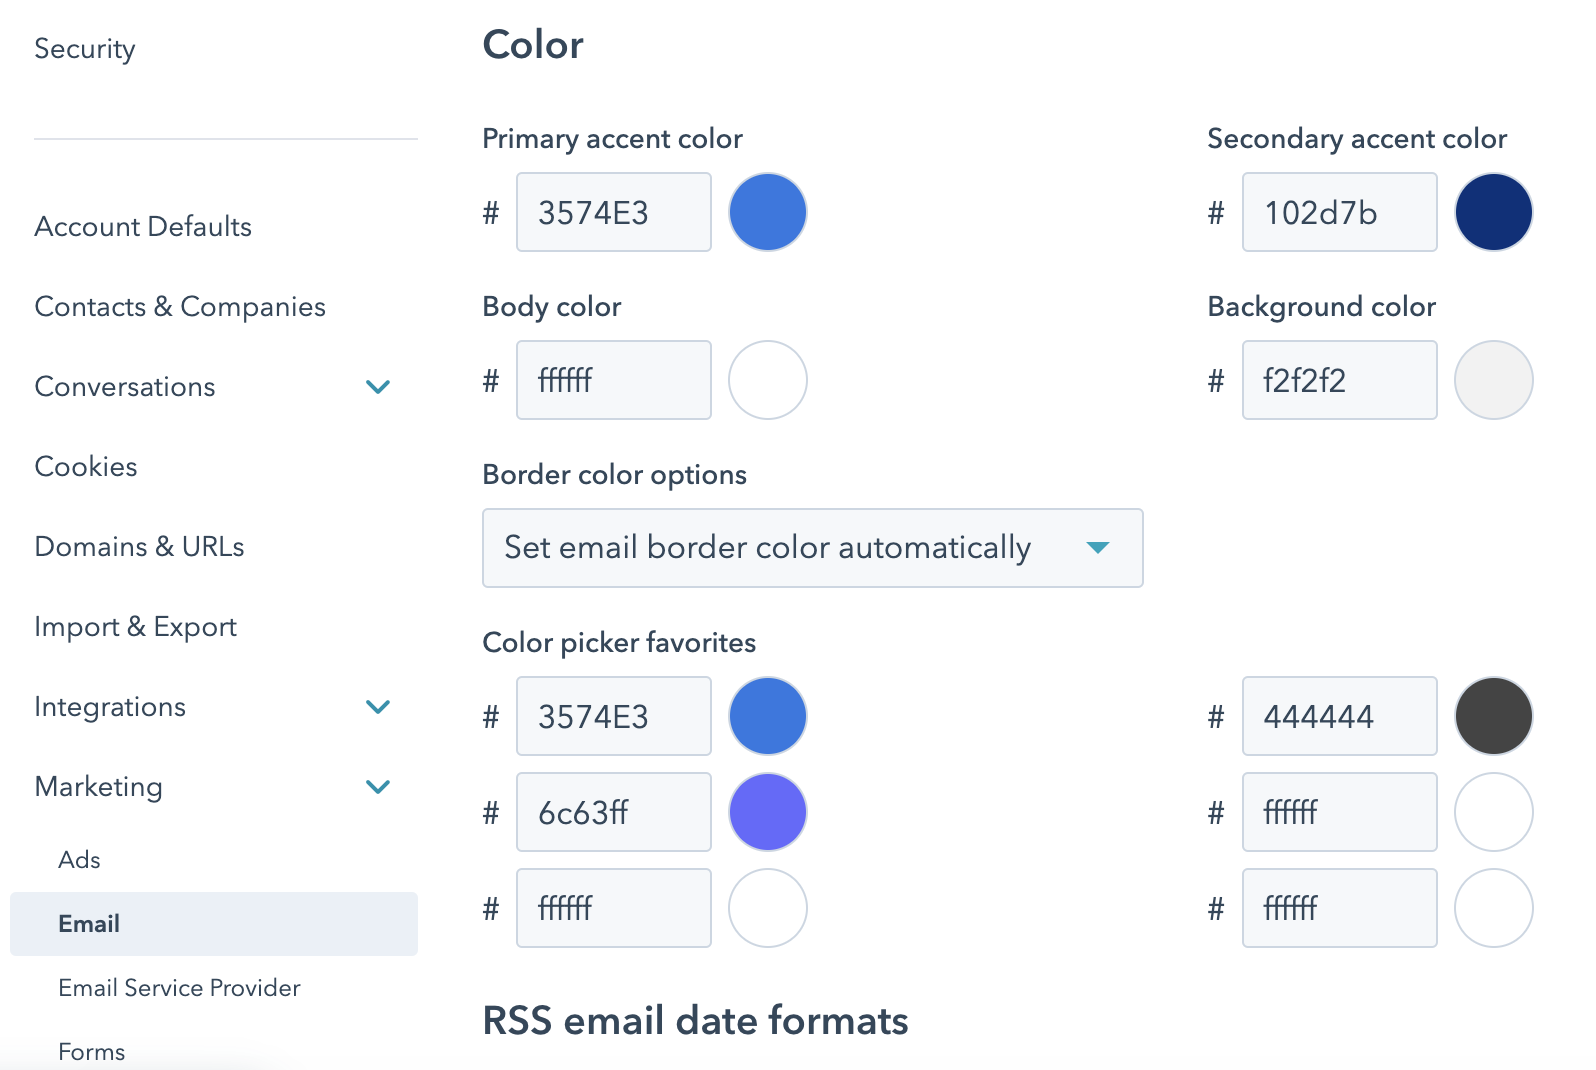
2.2 - Set color picker favorites
This will allow you to select from preset colors during page creation
Navigate to: Settings > Marketing > Email
3. Website settings
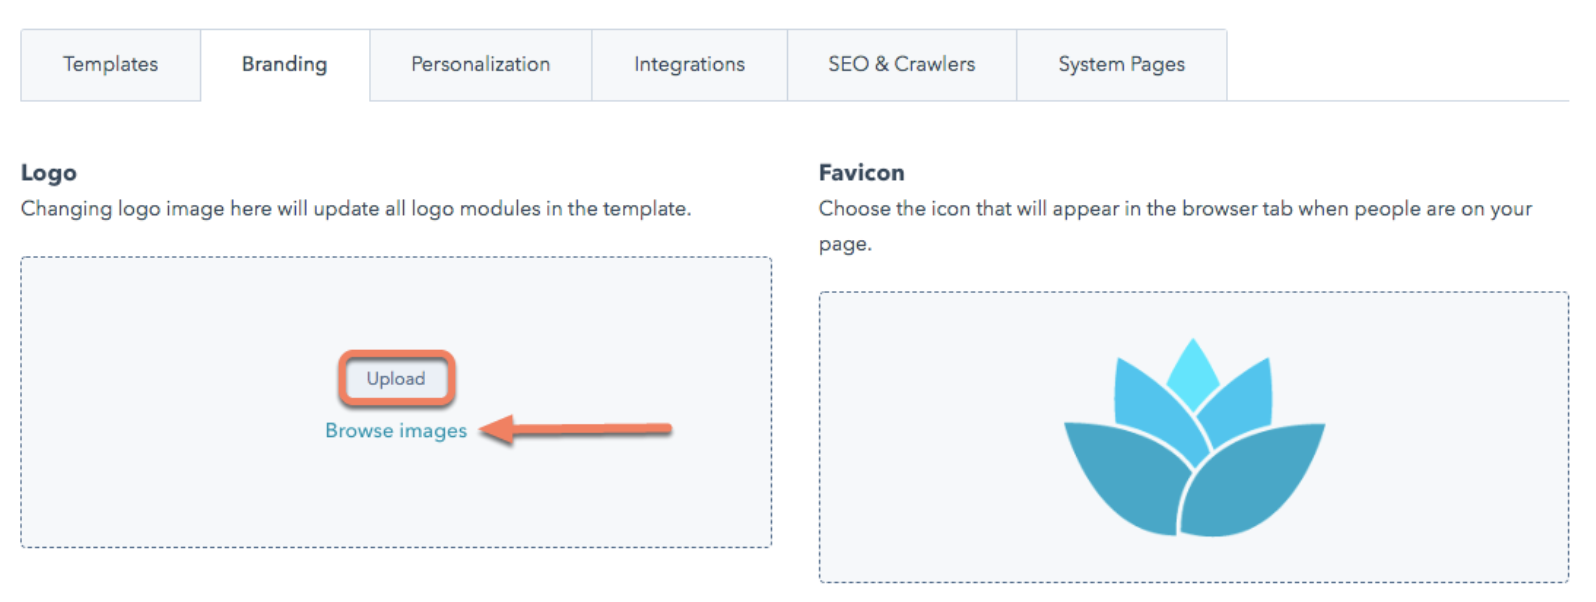
3.1 - Set default site logo image
You can add or edit the default logo image for the logo module used to create page, blog, and email templates. The default logo can be set for a specific subdomain or applied across Default settings for all domains
Visit HubSpot's knowledge base to learn more:
3.2 - Set favicon
A favicon is the small image in a browser tab next to the page title, usually based on the website you're visiting. You can customize the favicon for your HubSpot-hosted website.
Visit HubSpot's knowledge base to learn more:
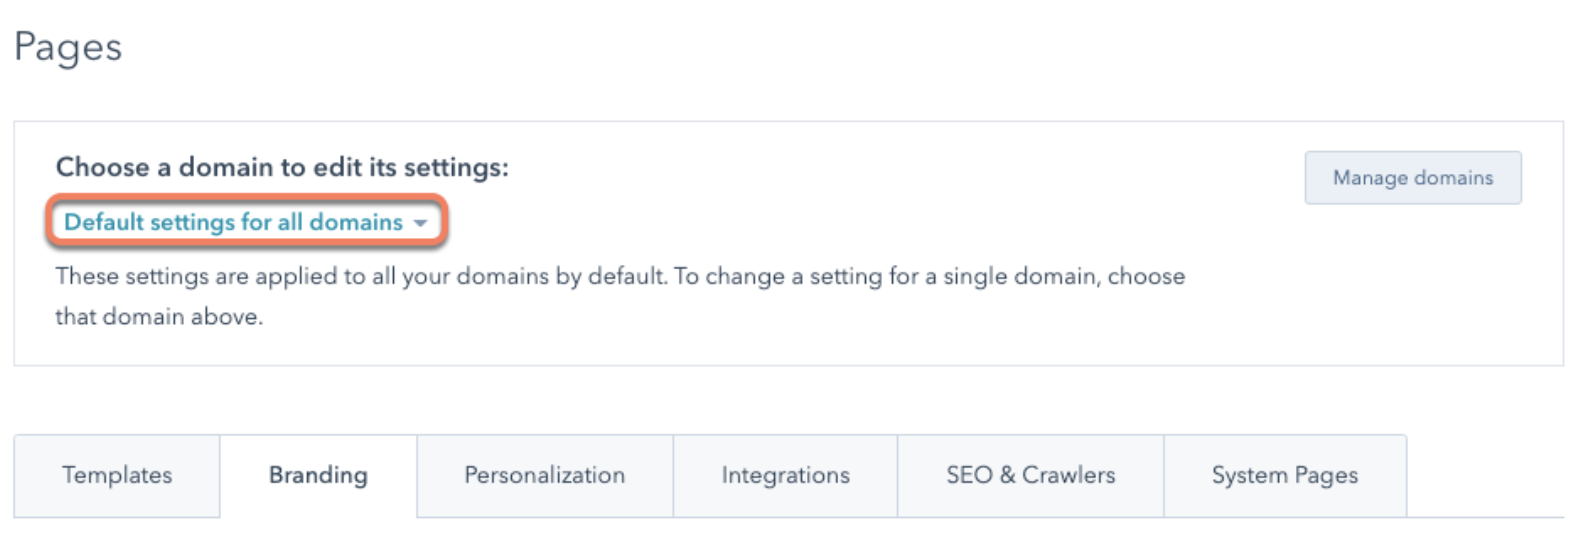
3.3 - Set error page templates
Select your 404 and 500 error page templates
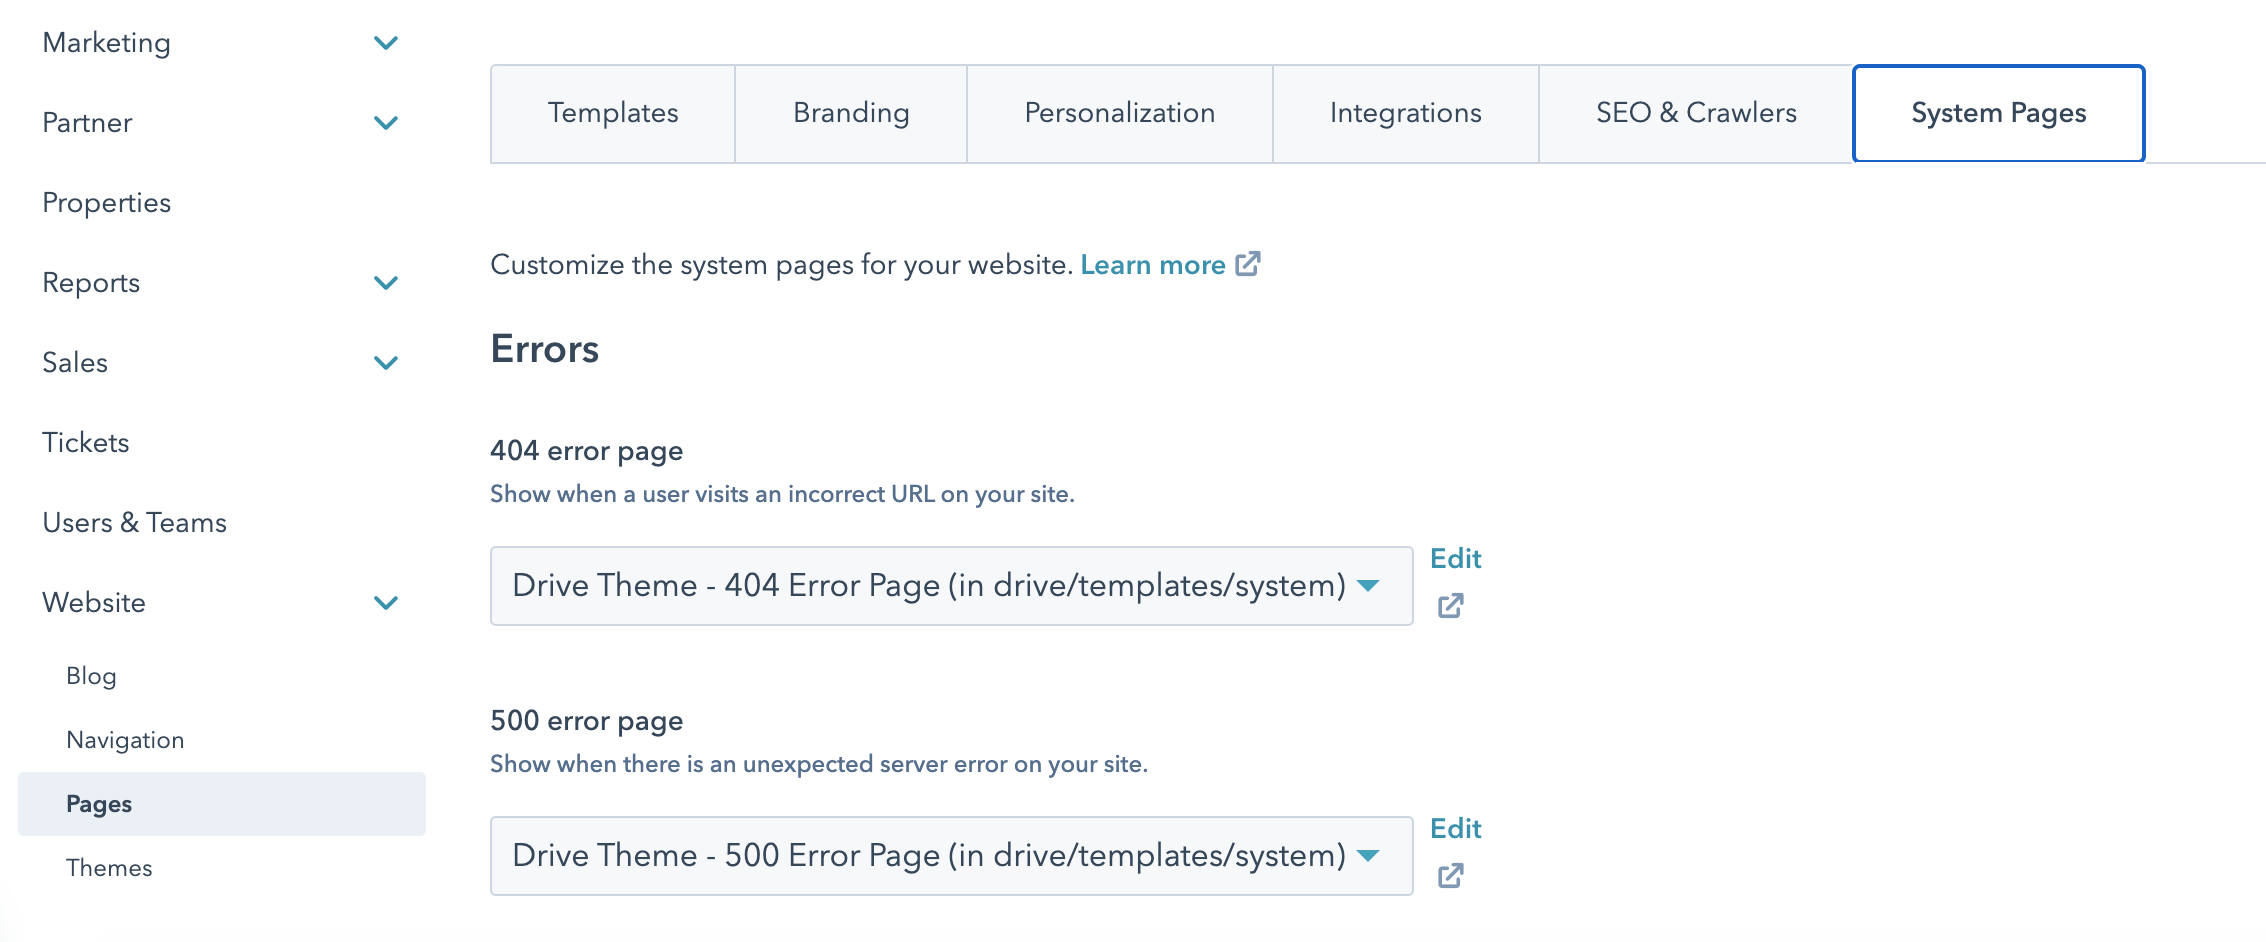
- In your HubSpot account, click the settings icon settings in the main navigation bar.
- In the left sidebar menu, navigate to Website > Pages.
- Click the System Pages tab.
- Click the corresponding dropdown menus to select your 404 error page, 500 error page, Password prompt page, and Search results
- page templates.
Visit HubSpot's knowledge base to learn more:
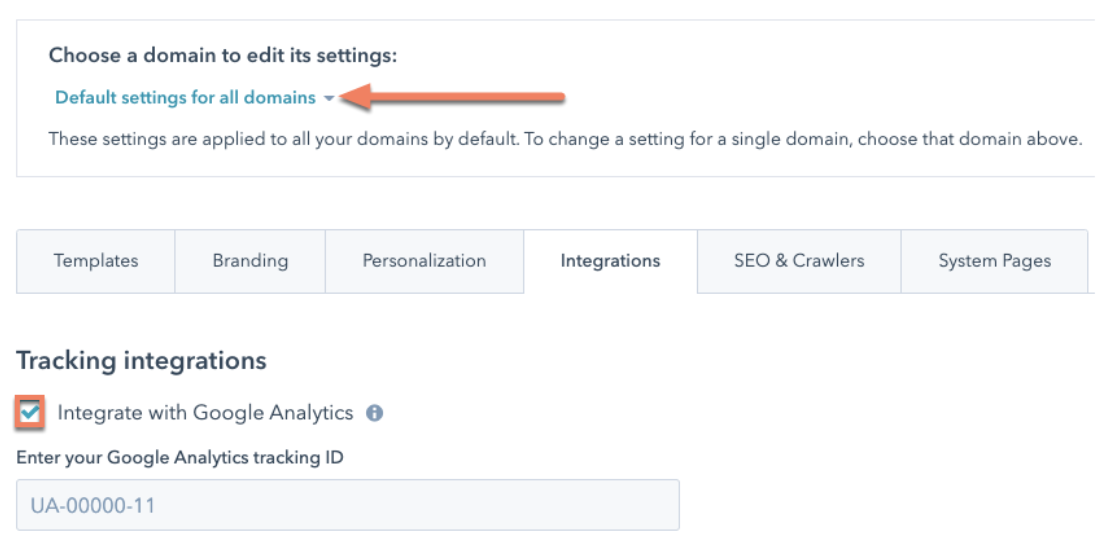
3.4 - Integrate Google Analytics
You can integrate your HubSpot website and blog content with Google Analytics by adding your Google Analytics tracking ID in your HubSpot settings.
Visit HubSpot's knowledge base to learn more:
4. Blog settings
Before you start creating and sharing content on your blog, you'll need to configure your settings. You can customize your blog's root URL, date format, comments options, subscription email settings, and more.
Visit HubSpot's knowledge base to learn more:
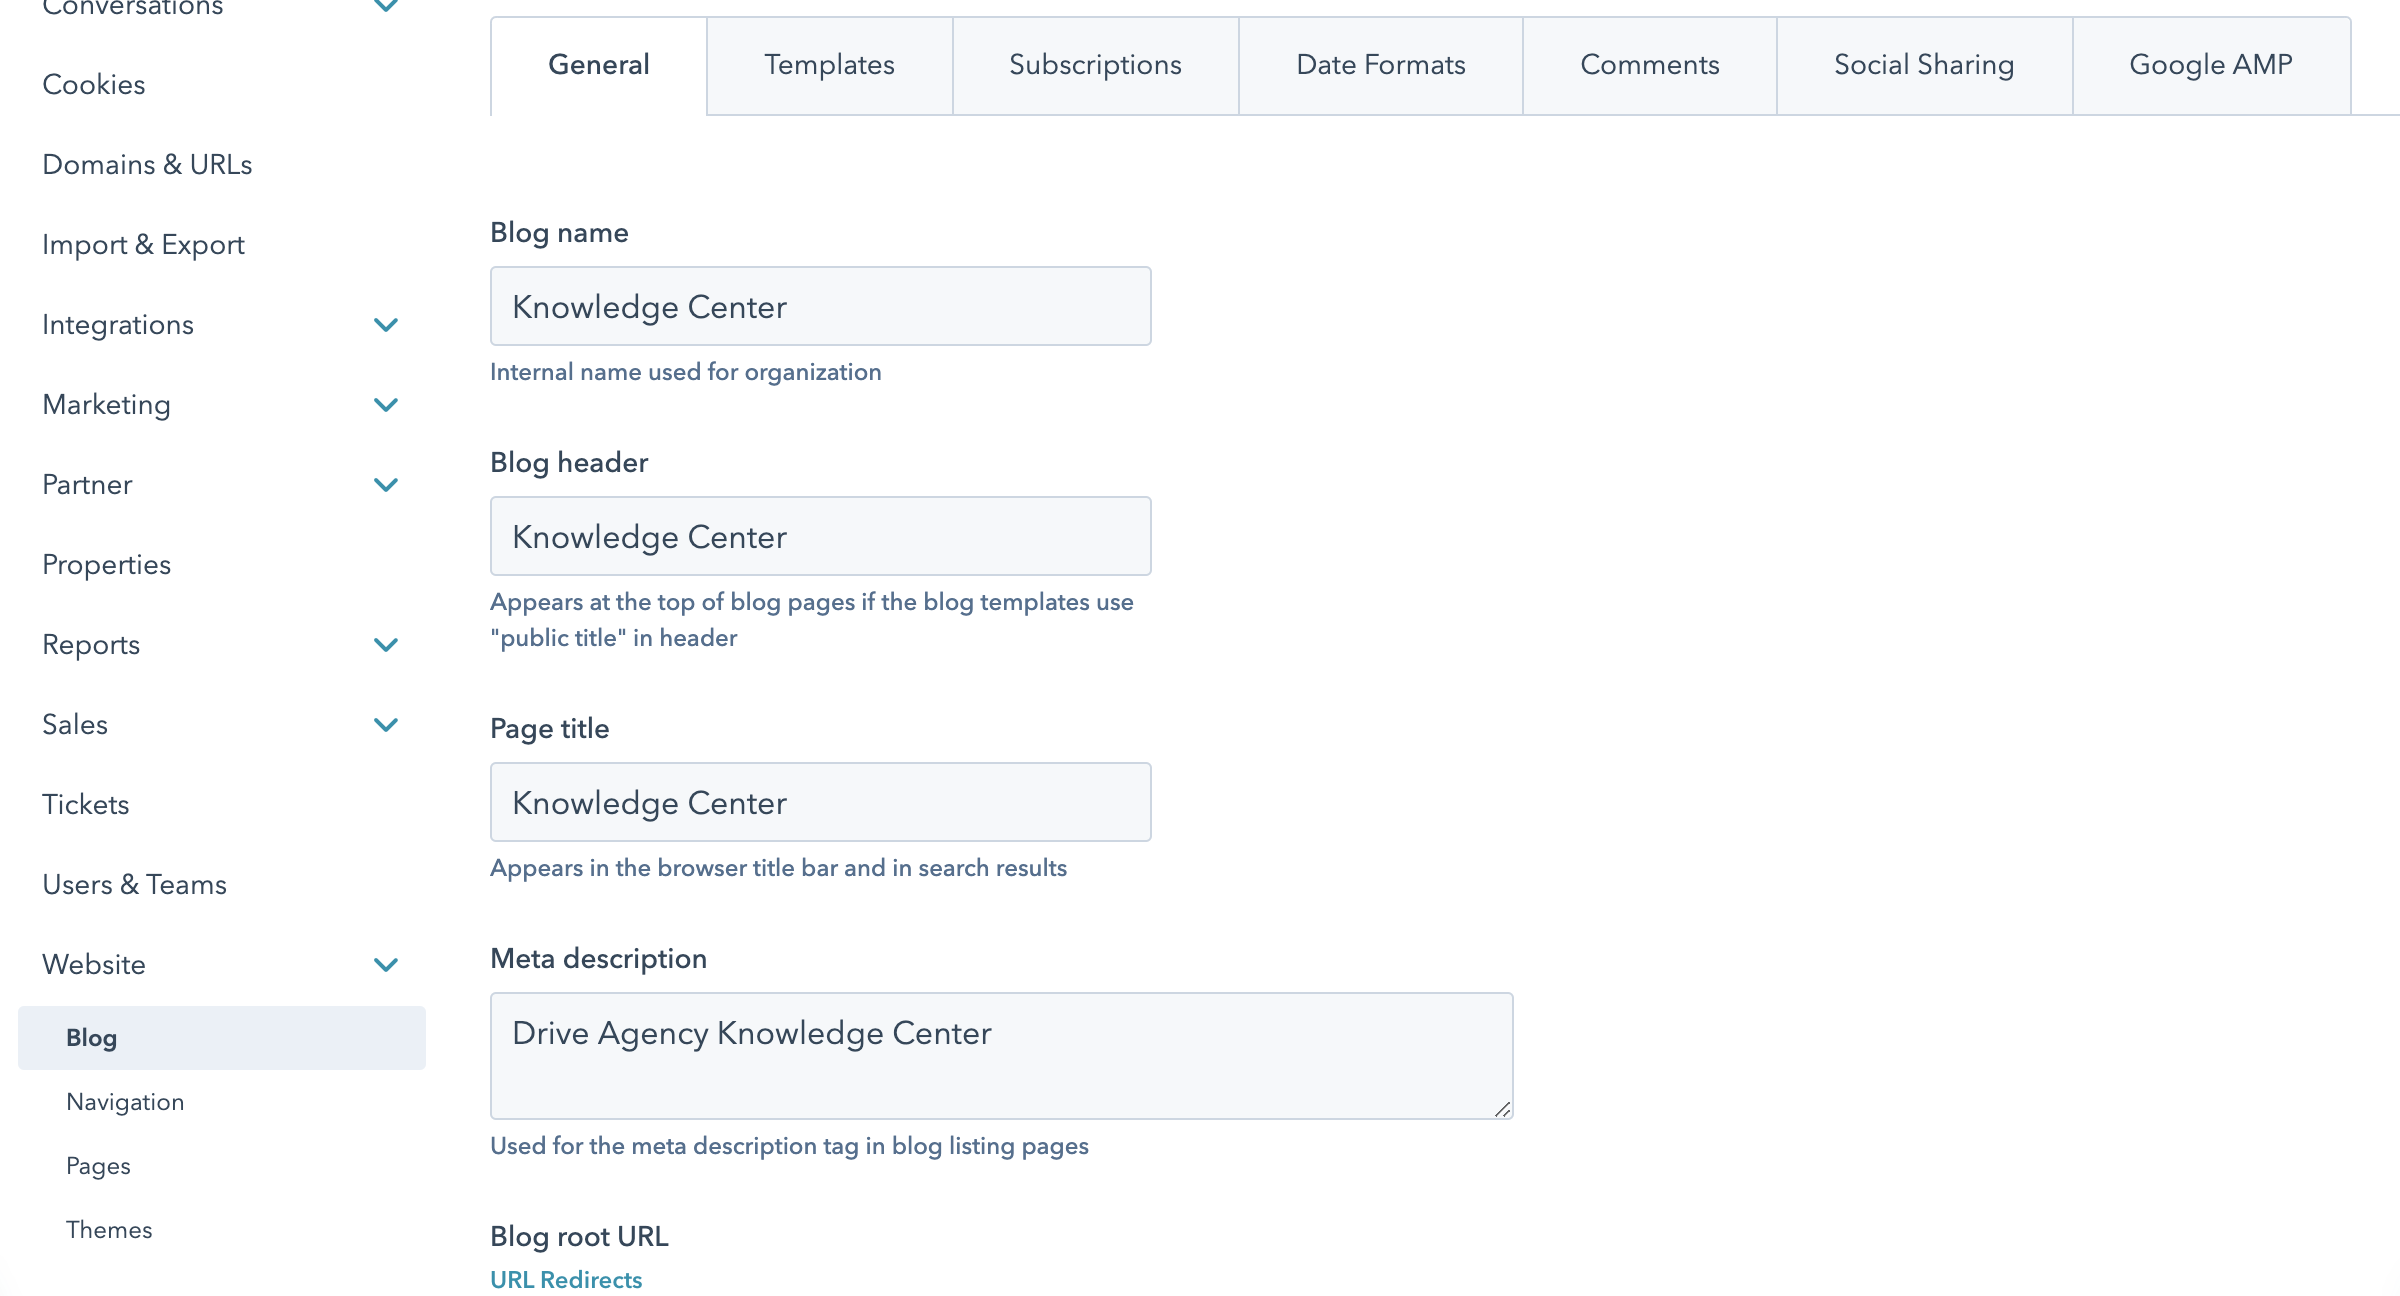
4.1 - Set Blog name
This is an internal name only, for your reference, in the event you have more than one blog in HubSpot.
4.2 - Set Blog header
The blog header appears in your blog templates if they use the public title tag.
4.3 - Set Page title
The title appears in the browser tab and in search engine results. It is recommended to keep the title below 70 characters for SEO.
4.4 - Set Meta description
The summary that likely appears in search engine results for your blog. Google, for example, may not use the meta description.
4.5 - Set Blog root URL
Click the Blog root URL dropdown menu to select a domain for your blog to be hosted on
4.6 - Select Template for blog posts
Select the Drive Theme blog template for your blog posts
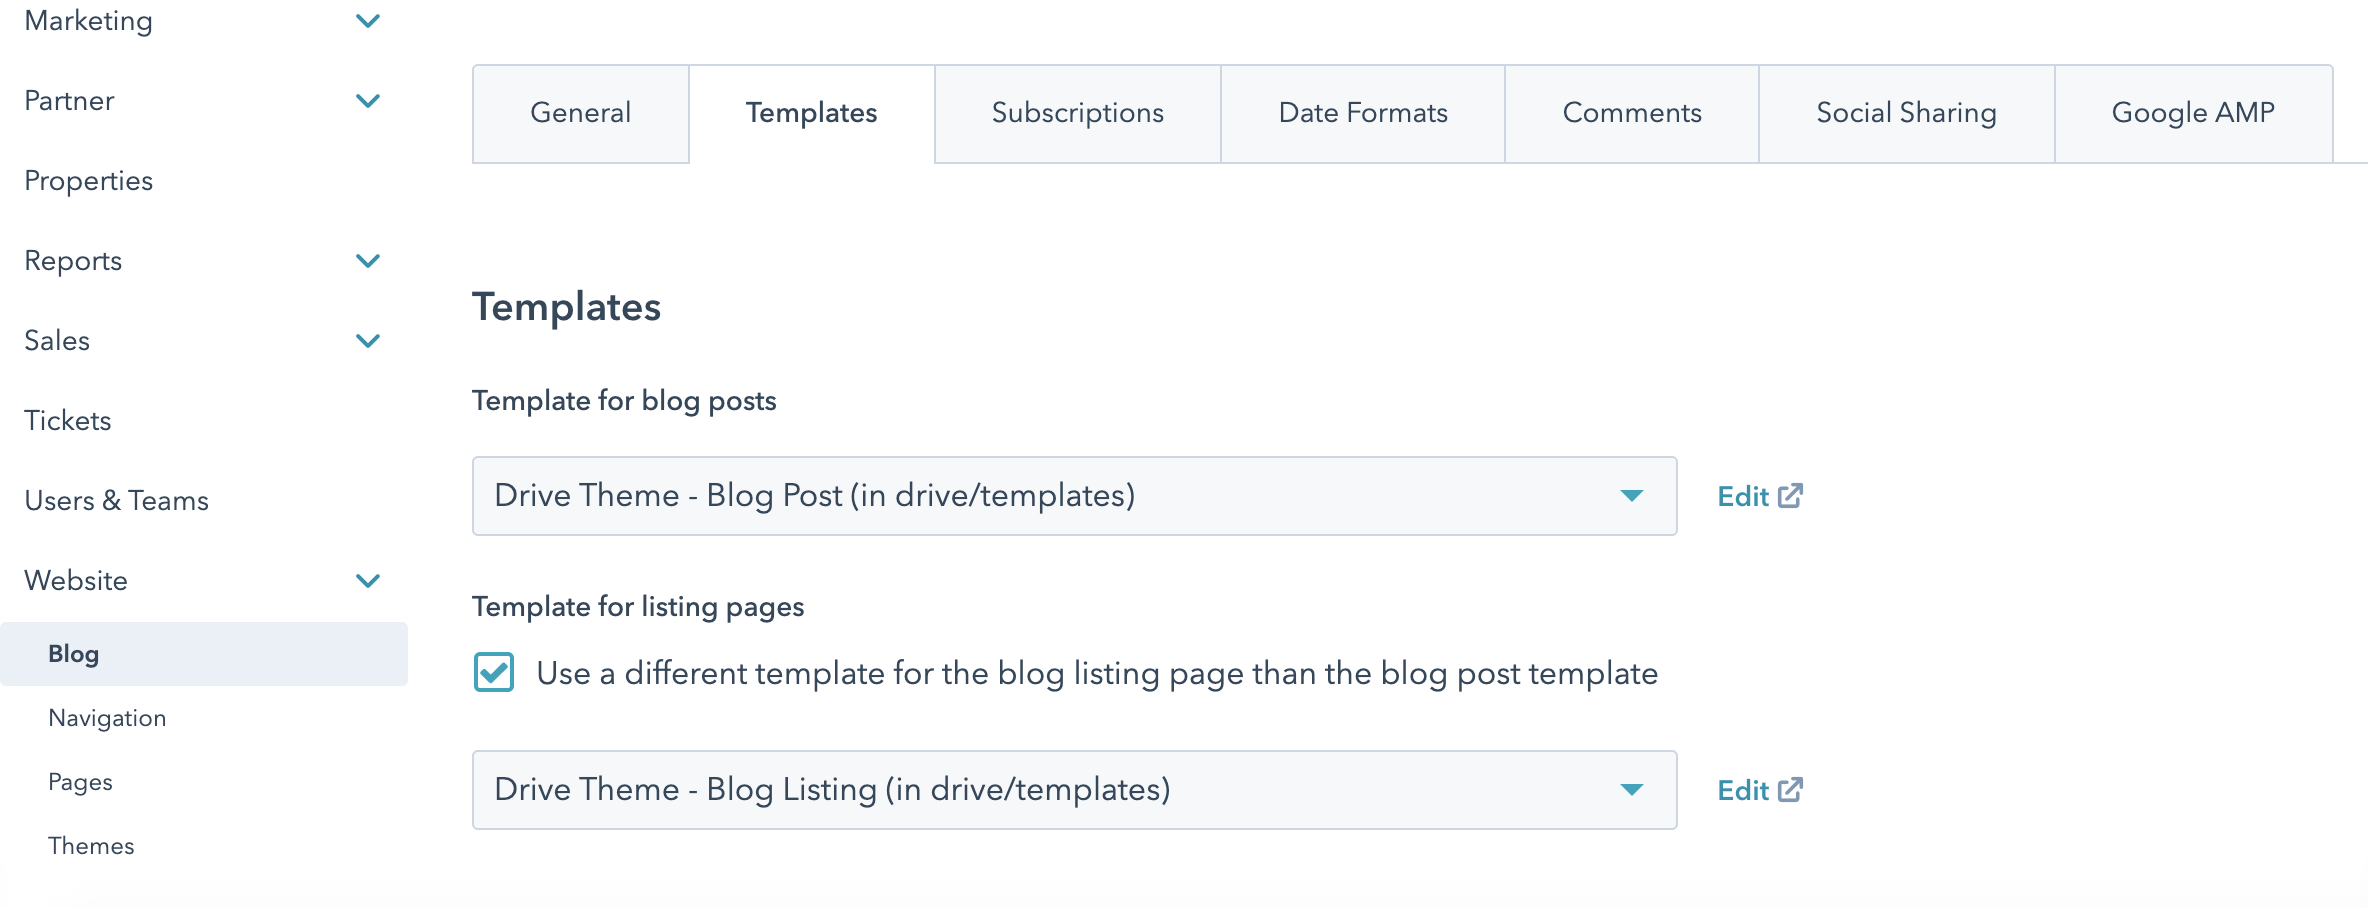
4.7 - Select Template for listing pages
Select the Drive Theme blog template for your blog listing page
5. Marketing Assets
5.1 - Create forms
Use forms to gather important information about your visitors and contacts. In HubSpot, you can easily create forms to add to your HubSpot pages.
Visit HubSpot's knowledge base to learn more:
5.2 - Create live chat
Create a chatflow with live chat to connect visitors directly with members of your team. The live chat will appear as a widget on your website pages that visitors can click to start a real-time conversation with someone on your team. You can create a live chat to connect a visitor on your pricing page to a member of your sales team, or another live chat that connects a visitor on your knowledge base articles to a member of your support team.
Visit HubSpot's knowledge base to learn more:
5.3 - Create calls-to-action (CTA)
A call-to-action (CTA) is a button you can use on your HubSpot content to drive prospective customers to your website, where they can then convert on a form and be added to your contacts database. CTAs should be visually attractive, action oriented, and easy to locate on your pages.
Visit HubSpot's knowledge base to learn more:
6. Web site development
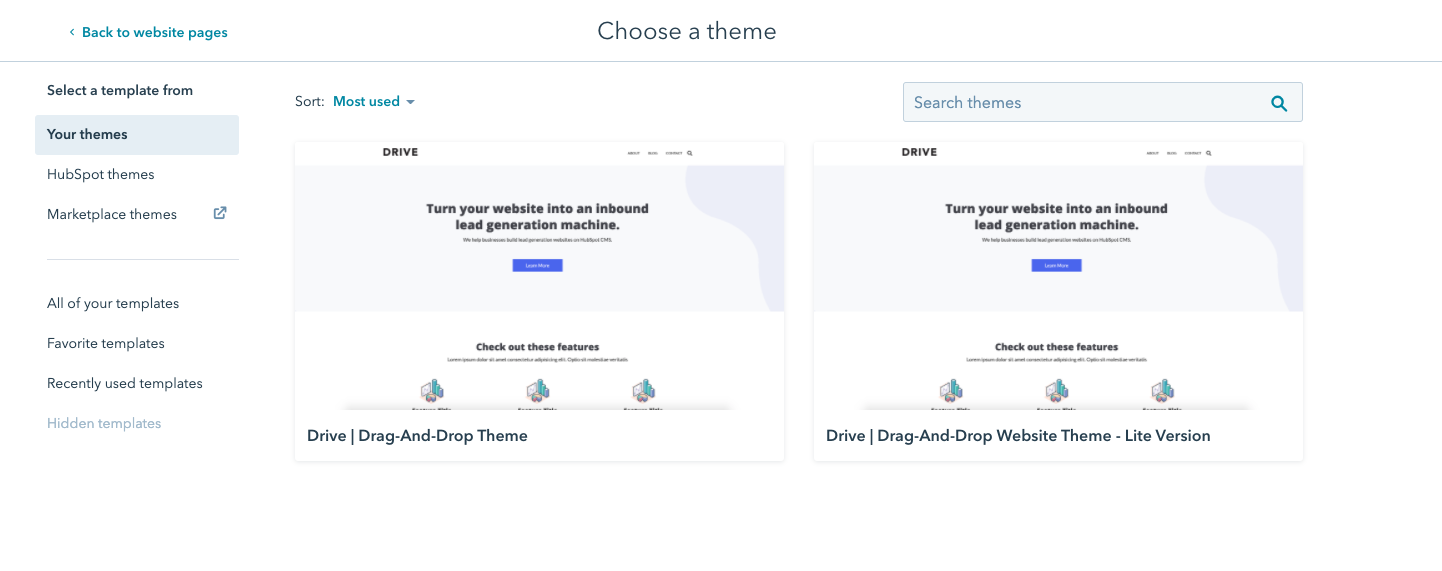
6.1 - Click Create Page and select a Theme

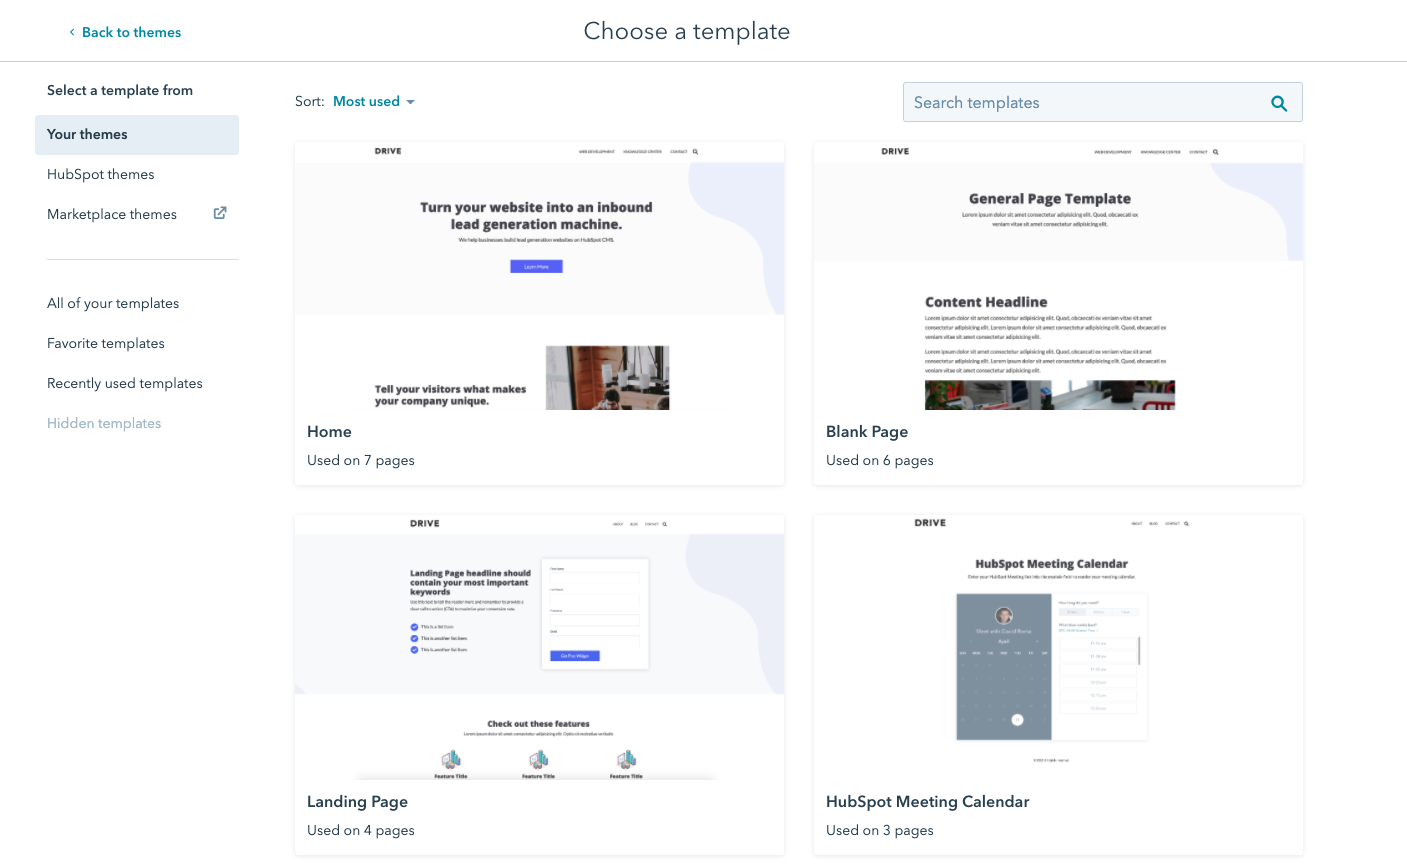
6.2 - Select starter template
6.3 - Configure global content
Click on the global header or footer to update global content such as selecting which navigation menu to use.
Watch demo video
6.4 - Configure theme settings
Update global design settings such as fonts, colors, button styles and more:
Watch demo video:
6.5 - Build your pages
Use the drag-and-drop tool to construct pages:
Watch demo video:
6.6 - Configure page settings
Watch demo video:
https://www.loom.com/share/d03914125a48490cbafabf42157ba77b
Set internal page name
This is an internal name only, for your reference.
Set page title
The title appears in the browser tab and in search engine results. It is recommended to keep the title below 70 characters for SEO.
Set page URL
Click here for URL naming convention best practices
Set meta description
The summary that likely appears in search engine results for your site. Google, for example, may not use the meta description.
Set featured image
The image that will appear in social posts
7. Check SEO optimizations
Ensure all green checks in Optimize tab
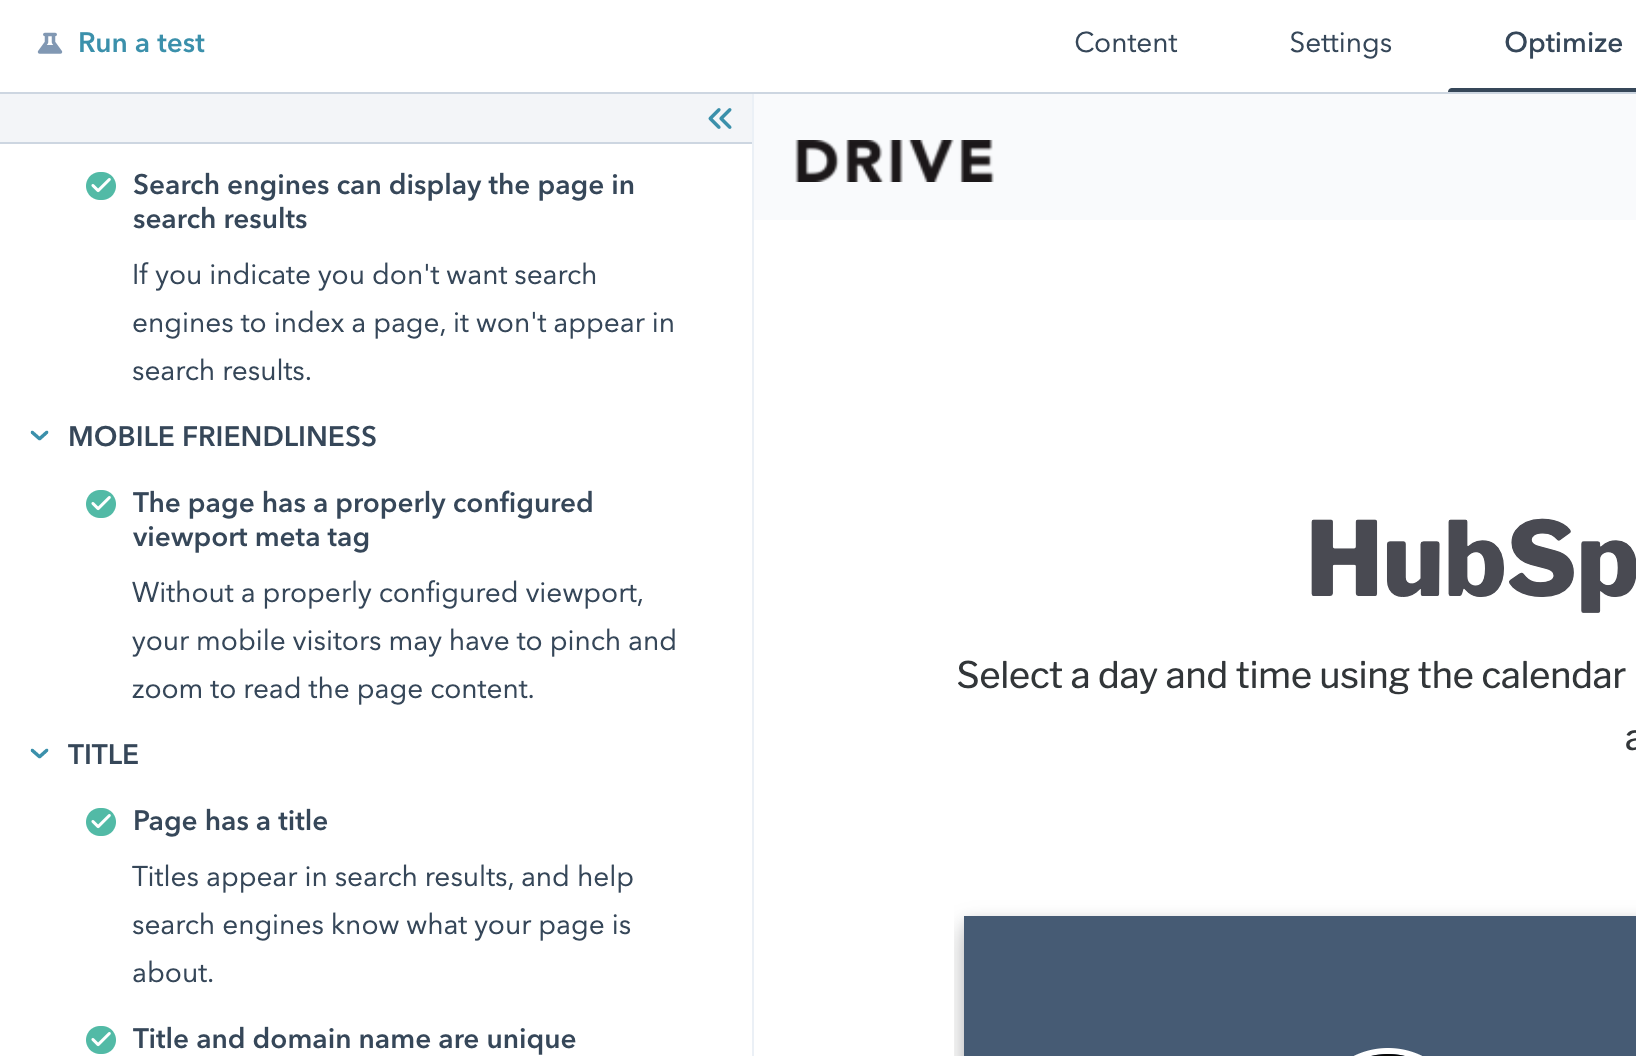
Watch demo video
8. Website Asset Migration
8.1 - Upload images to file manager
In HubSpot, you can upload files to the file manager and use them in your HubSpot content. Once uploaded, your images, fonts, audio files, PDFs, and other files will be hosted on HubSpot's content delivery network servers.
Visit HubSpot's knowledge base to learn more:
8.2 - Migrate website copy
Make sure copy is in Plain Text format before pasting into website manager to avoid potentially copying unwanted characters
Learn more:
8.3 - Import blog posts
The best way to import your blog content into HubSpot depends on the type of CMS your blog is hosted on, and the way your blog template was designed. Learn more about how each blog import method works, and recommendations for your blog import based on your CMS.
Visit HubSpot's knowledge base to learn more:
9. Preview and testing
9.1 - Device testing
Test page layout across mobile, tablet and desktop screens using the Preview tool
Watch demo video:
9.2 - Staging content for review
With the content staging tool, you can redesign and relaunch your website pages in a staging environment. You can redesign and replace existing HubSpot-hosted pages, or create new pages from scratch. Any content created and published in content staging is hosted on your-domain.sandbox.hs-sites.com. When you're ready for your redesigned pages to go live, you can replace the live pages on your website with one click. The original pages on your website will be archived automatically.
Visit HubSpot's knowledge base to learn more:
9.3 - Browser testing
Use BrowserStack for interactive cross-browser testing
Learn more about BrowserStack: